 This post is an upgrade guide for improving a TEVO Tarantula 3D printer both in its precision in order to produce better prints as in its usability in order to provide convenience to its usage.
Let’s start with the basics as why the Tarantula model was selected. There are currently many 3D Printers available on the market which might be more precise and usable than the tarantula model. In fact, Tarantula is an assemble-it-yourself 3d printer when there are ever pre-assembled 3d printers capable to produce prints out of the box. So what does it make this model worthy of attention? As it was stated in another one of my posts about how to maintain this printer, from the one side, the benefit of being a significantly less expensive printer to purchase and from the other, once properly set up, to become a very precise system, is an essential trade-off and one of the reasons many makers have selected it. Another reason is that since it is an assembled model, it can be maintained, customised and upgraded which is a feature that pre-assembled printers may prevent as they arrive in the form of a more complete and protected product.
How is an assemble-it-yourself printer being upgraded?
The benefit of assembled 3d printers, from a system’s perspective, is that they are literally self-upgraded! In more detail, a 3d printer may be used to print parts which may be used to upgrade the 3d printer itself! Currently, there is a large community of makers who contribute to this kind of 3d printer models, with upgrade parts, and host their designs in online databases for 3D printed models as:
https://www.thingiverse.com/ and
https://www.myminifactory.com/
The benefit of having such a community driven interest and contribution is that in most cases a person may find a ready to be printed object which already solves a problem someone else previously came across.
How is this guide useful?
From all of these parts, some of them are essential to the overall printer’s setup while others may not produce a significant impact, some may be faster to be printed and have an immediate effect while others may be important but may require more effort and might not be the best option for a given moment. This guide acts as a guideline for someone who just got a new Tarantula with the goal to spare him from getting lost to all of the available parts and strategically increase the system’s precision and usability from a fast yet effective route. In other words, in each step, the guide takes into account factors as the current system’s setup, its weak spots and its needs!
Scale-Up!
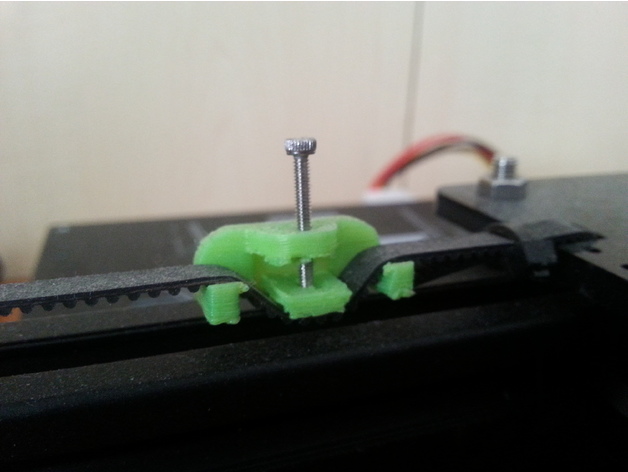
1. Adjustable Belt Tensioner/Tightener and Belt Tie (Tevo Tarantula) – precision
https://www.thingiverse.com/thing:1780636
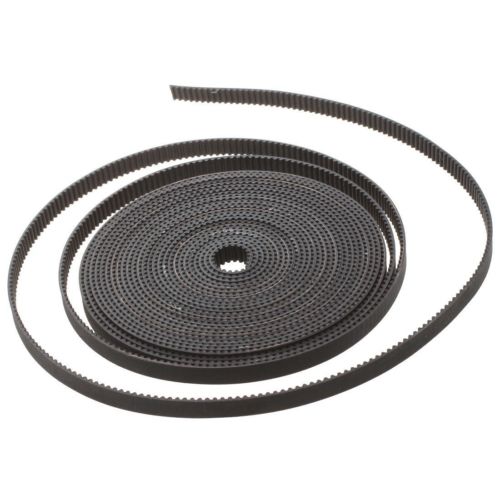
The first printer’s need is to tighten the X and Y belts. By tightening the belts the printing precision is increased. This ingenious piece is as small as it can be and still provides the required precision needed. One for the Y-axis may be printed as well!
this is a: fast print – to be later replaced
2. Tevo Tarantula X Axis Idler – precision
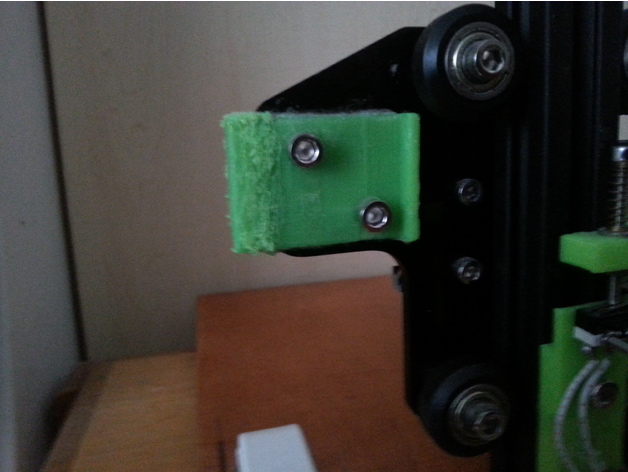
https://www.thingiverse.com/thing:2418924
From the printer’s setup, it may be observed that the X axis has loose belt wheels with no support from the opposite side, this great part is fast to be printed and provides the desired solution for this problem until something more precise but with more printing effort is printed.
this is a: fast print – to be later replaced
3. Tevo Tarantula in front Z axis endstop holder – precision/usability
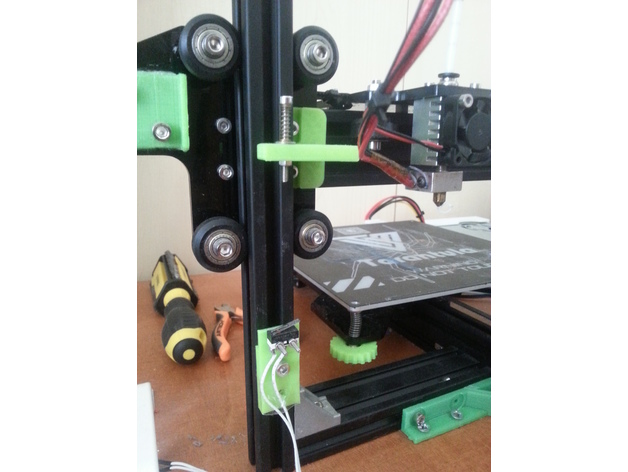 https://www.thingiverse.com/thing:2587618
This part, as the previous ones, is fast to be printed, yet very effective. It’s goal is to bring the z-endstop in the front of the setup in order to increase its usability when calibrated but that’s not all, in addition, it increases the endstop’s precision as now a screw may be rotated to provide far grater precision when adjusting the z-axis home level height.
this is a: fast print – is not to be replaced
4. Tevo Tarantula bed level knob – precision/usability
https://www.thingiverse.com/thing:2330042 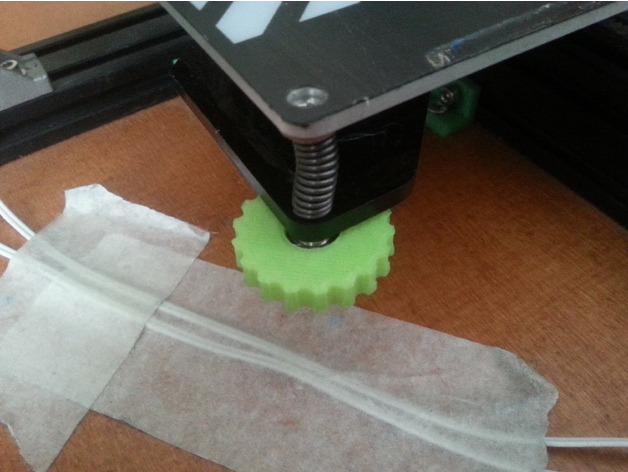
The specific knobs were selected over others as they have a grater radius. In circular motion the bigger the radius, the greater the precision and thanks to the upgrades so far as shown in the guide, the knobs may be printed in great precision!
this is a: fast print – is not to be replaced
5. Z-Axis Stepper Bracket for TEVO Tarantula – precision/protection
https://www.thingiverse.com/t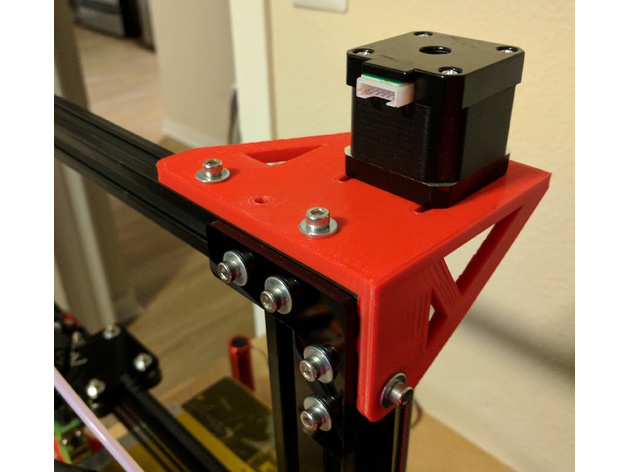 hing:2269993
The next piece is for the z-axis as the original one is not very sturdy, shakes a lot which is something that reduces precision and may easily break in case of a non-responding z-endpoint. The particular piece was selected due to its great design which provides support from edge-to-edge!
this is a: slow print – is not to be replaced
6. Belt tensioner pulley for Tevo Tarantula
https://www.thingiverse.com/thing:1704100 
As the previous step, this phase is slow and needs five parts to be printed but produces an effective solution for adjusting the Y belt. From now on this piece may give a millimetre scale precision when setting the Y belt.
this is a: slow print – is not to be replaced
7. A Sturdy Simple Spool Holder – usability
https://www.myminifactory.com/object/3d-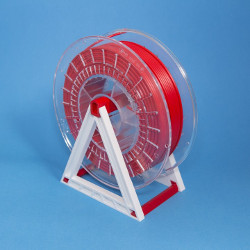 print-a-sturdy-simple-spool-holder-43701
Up until now there wasn’t any support for the filament’s holder and it was let to the user to improvise and create a spool holder himself! This piece may provide the ability to easily manage filament cylinders and may give some elegance to the setup!
this is a: slow print – is not to be replaced
8. X Belt tensioner for Tevo Tarantula
https://www.thingiverse.com/thing:1730521
Similarly with the Y belt tensioner usage, this part tensions the X axis. The first two parts did their work up until now and its time for them to be stored for fail-safe!
this is a: slow print – is not to be replaced
9. Enclosure for TEVO tarantula display – usability/protection
https://www.thingiverse.com/thing:1878931 
So far, the LCD’s transparent case may not be best suited to isolate and protect the LCD case. This model may just satisfy this need and allow the user to properly interact with the controller.
this is a: slow print – is not to be replaced
10. Wooden surface with shock absorbers and handles – precision/protection/usability
One wooden surface may be used in order to mount the 3d printer over it, and thus, to make it become more shock resistant as well as to easily be carried around. The surface can be 64x64cm with a thickness which should be between 1 and 1.5cm, 1.2 might be a good value as a thick surface may significantly increase the total weight while a thin one might easily break! In addition, metal handles may be placed left and right of the surface to lift the platform while 8-12 rubber bumper feet may be placed below the surface to absorb shock.
Secure the 3D Printer on the surface by using the following parts
XY Squareness corner for Tevo Tarantula 3D Printer
https://www.thingiverse.com/thing:1748591
this is a: fast print – is not to be replaced
Corner Brackets For System20 2020 / 2040 Extrusion
https://www.thingiverse.com/thing:2841415
this is a: fast print – is not to be replaced
Tevo Tarantula bottom-left brackets
https://www.thingiverse.com/thing:2611549
this is a: fast print – is not to be replaced
The above models may be used to secure the 3d printer on the surface. This step might seem a bit troublesome but may significantly increase the precision as well.
11. Tevo Tarantula Power Supply Covers – protection/usability
https://www.thingiverse.com/thing:2365003 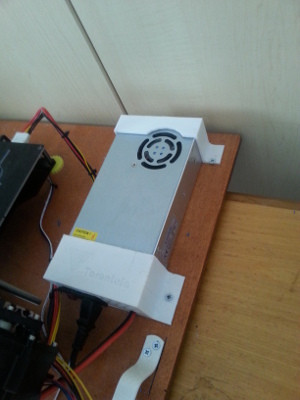
The last piece would be to secure the power supply to the wooden surface. The produced outcome will both satisfy the need for protection against an electric shock and make the 3d printer totally portable. After this step, the user will be able to conveniently move the printer around!
By this step, Tarantula will be much more precise, portable and usable. This was the list hope you liked it!
12. A second detachable surface on top of the heating bed
Sometimes to remove a single finished object may require a significant effort. To have one detachable surface may be more practical while it may protect the bed from accidents while removing it. When choosing a second surface it must be kept in mind that it should be heat conductive, as aluminum, which is a good choice while a surface from wood of plastic, as seen frequently on the web, may not be the best alternative!
Reaching this step you may find your Tarantula to be much more precise, portable and usable. This was the list hope you liked it!
This is my TEVO Tarantula so far where most of the above parts were used!

Lessons learned from TEVO Tarantula
At this point I believe this 3D Printer model has reached the highest of its potential. In other words, further upgrading it means to actually change it to something entirely different. For this reason, the final weak spots may serve as an advise for other 3d printer models to be aware of!
The first lesson is about bars with a single mount point, when a bar is hooked only form one side like the corners on the base of the Tarantula, similarly with other models as the CR-10 and Black Widow, no matter how strong a corner is, the bar may demonstrate angle deviation on its other edge!
To effectively solve this problem the best design for a 3D printer, by my point of view, is a cubic grid where all the moving parts are inside as the following setup shows.

In addition, if uniform temperature is needed for a 3d print, a cube may serve as a grid where surfaces may be attached to cover the inner space in order to trap heating, if it’s taken into account that all the parts are inside the cubic setup and it’s allowed to close.

The next observation is about the problems related with the X and Y axis movement. The concept of bearings which guide the moving parts over extrusion profiles has some serious negatives. The first one is that the setup may be easily loosen by the passage of time which creates wobbling, decreases performance and requires tuning once now and then. In addition, this kind of setup requires a lot of space and many pieces: 4 bearing cylinders, one bracket to hold them and one bar to guide the movement. A far better alternative to move a surface would be to have two linear rails with cylinder rods.
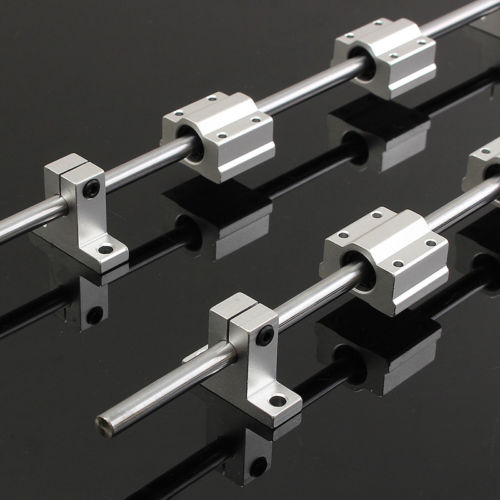
By using these type of rails, the movement is totally guided while friction is significantly reduced!
Regarding the extruder, there are many solutions available on the web which present over-weighted extruders with lots of fans over them, for me having all this setup was not essential. Having one fan was enough to cool the parts from heat, on the other end, cooling the filament on its exit point might result into better 3d prints with no support but may also prevent the filament from properly sticking together with the already printed surface, as well as, prevent the smoothing effect when the nozzle touches an uneven printed ‘hilt’ on the surface!

 It’s very fun to start something new in life, especially when it comes in taking the decision to participate in a Master’s degree. Participating in a Master’s degree programme is something fun and worth the effort doing it not only for the result which is the degree as for the process itself which grows you as a scientist, professional but more importantly as a person. If you have decided to participate into one and since I’ve been there, the only thing I can at least do, is to share my insight from my collective experience and the key-points which I have come to value the most in order to help you shape a more fitting culture for what is to follow. Therefore, here is my Masters Doomsday Survival Guide to pass successfully a Master’s degree .


 Type: GT2


 Inner/Shaft/Axis diameter: 5mm to 8mm (may get tightened from the screws)